Woodworking/Shop

Adjustable Workbench Cigar Holder

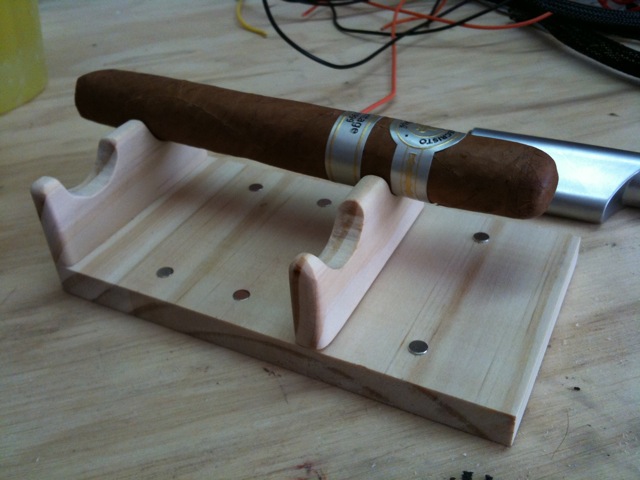
I usually put my burning cigars across the top of a ceramic mug on my workbench when I'm in the garage. The great thing about ceramic is that it's pretty much fireproof. What fun is that? The real problem, though, is that the cigars got short enough toward the end of smoking that they wouldn't fit across the mouth of the mug. So, I built an adjustable holder that IS flammable: Adjustable cigar holder complete with rare earth magnets

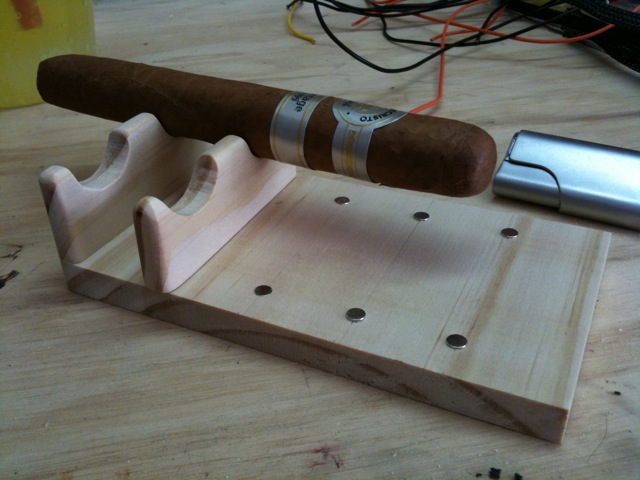
Super easy to build. A couple of pieces that sit veritcal, one that is permanently attached at the end of the base. The other has two magnets in the bottom that are attracted to the sets of magnets stuck into the base. As the cigar gets shorter, you simply slide the movable vertical thingie closer to the fixed one.

Adjust as needed for cigar length

Magnets are left over from the casino dice Rubik's cubes I made (see posts coming soon).

I had no plans. I just ran some extra pieces of pine through the band saw and drilled some holes for magnets and used Super Glue Gel to hold them in. Nothing to it. Hopefully, the cigar never burns down to the point where the hot end touches the wood on the holder. :)

Sharp Clock (Saw Blade Recycling)

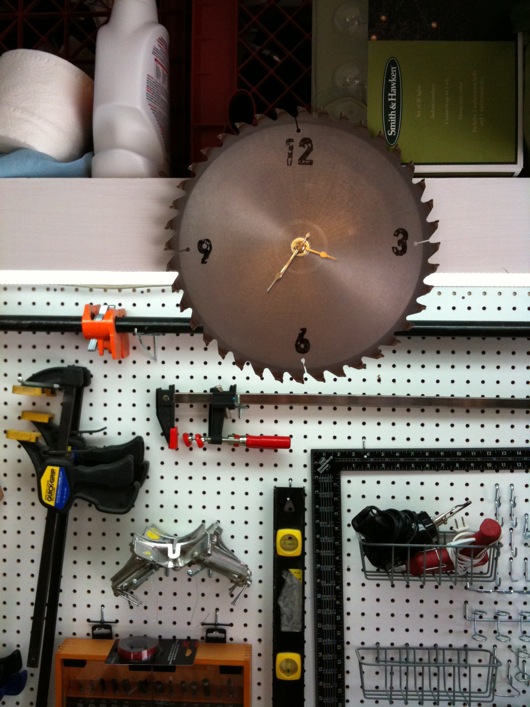
Puns are awesome. Saw Blade Clock

Run down to your local craft or hobby store and grab a $7 quartz clock movement thing. Sand the crap out of the face of an old saw blade. Get a permanent ink pad (I used black and some squishy clear stamp things) and stamp the numbers on the face. Hang it in your workshop or garage.

I bought the clock with a 1/4" stem (or whatever they call it) (the thing that sticks out of the face of your clock to which the clock arms are connected) from Michaels. There are different depths. This was the least of all of them. Saw blades are not thick.

I sanded the heck out of the face of the saw blade. Got it as clean and "brushed" as possible. This, I would think, allows the ink to "soak" into the brushiness of the metal and stick a little better. At least, it probably wears better.

I bought a Staz On Jet Black permanent ink ink pad, a set of Inkadinkado clear acrylic stamp pads, and a set of Recollections Clear Stamps in a font that seemed garagy/workshoppy. Then, I simply inked up the characters I had stuck on the acrylic stamper things and pressed the numbers onto the face of the saw blade.

The clock movement didn't quite fill the hole in the center of the blade, so I used a washer big enough to cover the reminder of the opening that the clock movement stem did not fill. I then tightened the movement down to the washer and the blade.

All you have to do after that is hang it. Make sure you put a sturdy screw into the wall or, in my case, the pine shelving. Saw blades are a little heavy. How do you explain the 10" saw blade clock lodged in your skull to your wife when you need a ride to the hospital? Exactly.

Office Chairiot™ First Run a Success!

Office Chairiot™ - labor in motion The Office Chairiot™ is a project I've been designing and building since last summer. The Office Chairiot™ is a battery-powered office chair towing device built with custom steel work and motorized scooter parts purchased on-line. With the amazing welding skizillz of the father of one of the owner's of the company where I work, my dream of a modular powered office chair came to fruition recently.

The real first run of the Office Chairiot™ was a week ago or so. There were a few hiccups, but with a little on-site tweaking, it ran well considering it was the first time since the design-on-paper stage that it was fired up for realz. Thanks, Mike(s)!

The steel frame was reworked a little from the first run and arrived last night. It was late and time was short. Sadly, due to a wiring... Due to owner stupidity and some crossed wires, the test drive last night was postponed until this morning. Thankfully, the reversed wiring didn't result in a SECOND lost speed controller. There were no hisses or pops, as we were incredibly careful while testing the connections. Once I actually followed my diagrams, I realized we'd simply hooked it up incorrectly.

So, this morning, I reconnected everything properly, labeled the wire harnesses with my snazzy P-touch labeler, and made the first successful run of the Office Chairiot™ around the mostly empty office. It was clear that having power run to both tires simultaneously is a good thing. It is far better than torque on just one wheel, of course.

I donned my University of Michigan throwback football helmet and some costume old-style motorcycle goggles and piloted the Office Chairiot™ around the office. I was careful at first. I made a couple of runs at high speed (for an office chair, anyway) down the longer corridors of the office space. It was AWESOME! It's not skydiving, but it's not bad for a day at the office.

I'll post photos taken from the inaugural run soon. There were a few photographers on-hand, thankfully. Here is the first clean video from one of the runs with "cling-ons" aboard:

http://www.twitvid.com/DHV2X

Build photos and design stuff forthcoming.